Friday, December 30, 2016

Chapel interior design


(Brendan)

For the chapel interior we definitely wanted something timeless and classically-based. The first thought was to hire a classical architect or church architect but there's a couple disadvantages with that: 1) It's likely to be outside of our budget, and 2) Even if designed by someone else, there would be the task of translating that design to something that I could try to make or hiring someone else to install ($$$$!). In the end, better to try to design and construct it myself so that we save money, take our time, and if it doesn't turn out OK I'll have no one to blame but myself :-)


One of the best thing about Classical design is that there are so many resources online, including detailed dimensioned drawings. Once I start with a style or order, and I have the height of the wall I'm working with, everything else is related to that height. Here's some of the specific drawings that helped me:


Next step, translate these details into designs and dimensions for our chapel. This includes not just the final form of everything, but each step on how it could be constructed. Here was a spreadsheet I used to figure out how to construct the entablature:


Eventually I modeled everything in SketchUp. This helps avoid major errors because I modeled every step I would need to do and had to solve numerous problems that would have been awful to deal with in reality. 

Anyway, here's pics of the (mostly) final design! I will be tweaking a few things yet by the altar, but everything else is final. You can click any of these to enlarge. 

Here is a front view, with places noted for statues and a crucifix:


Here's a 3D modeled view. There will be rope lighting up above all the way around. 


A side view:


A view looking at the back:


A 3D closer view of the altar, which will be walnut. The altar follows the highest Composite Order in design:


And a view looking up from the altar:


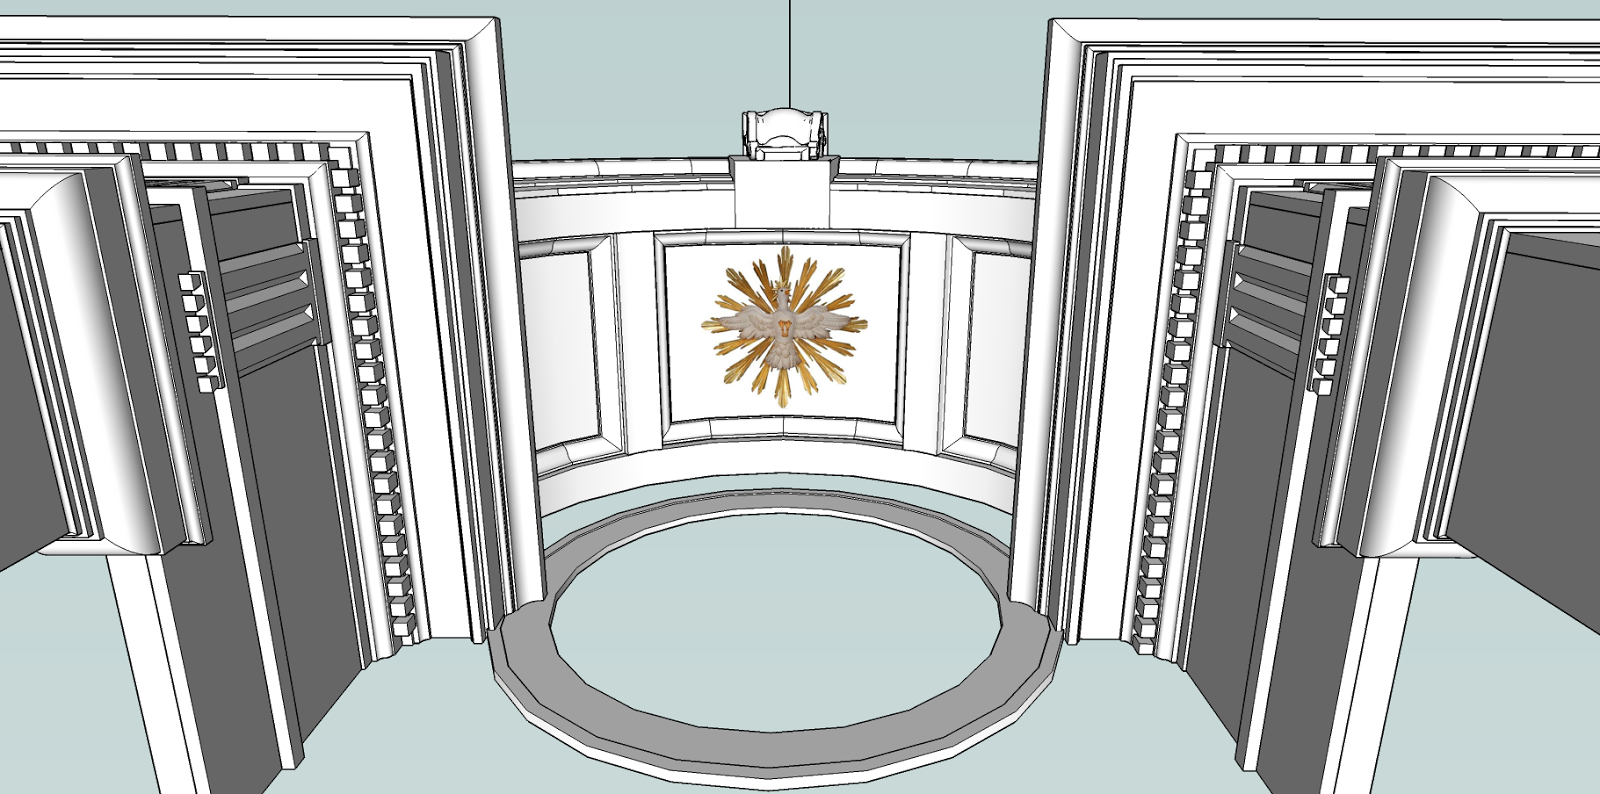
We will also have pendant lights (shown white below) and a speaker system (purple rectangles below) in the rear of the chapel:


The model above I actually needed during the structure construction so that the lights could be properly located in the ceiling, we could properly locate all the outlets up above for the rope lighting, and locate the speaker wire in the rear wall for the speakers. 

Next post I'll show the interior construction progress up to today.

Thursday, December 29, 2016

Long, slow task of the chapel interior...


(Brendan)

It's been quite a long time since I've posted an update on the chapel, and that's because the interior work is going more slowly than I had hoped. But, a month here, a month there, eventually you've actually made some progress. Here's what's happened since the last post...

Finishing the exterior (painting, final windows, grading, and gutters)


Door frame design and installation and door finishing

The door is stain-grade poplar and a design we liked as a chapel door. It's 8 ft tall and fitting for entering a sacred space, a different type of door than anywhere else in the house.


For the frame design I started the process of looking up classical sources, which is the basis for the interior of the chapel. I found the following set of temple doorway designs from a well-known classical source (Vitruvius' The Ten Books on Architecture - free online):


I liked elements of both doorways and also needed to consider the book cases near the door which would limit any overhang. I made the final design in SketchUp:


Each part of the door trim I created from scratch (either with a router or simply planed to the right thickness and cut with a table saw).


I've had to learn how to create cove molding from a table saw, passing laminated boards over the saw blade diagonally at a calculated angle.


All pieces are glued together on all surfaces to keep movement to a minimum. Then after sanding, all seams are caulked, all surfaces primed, sanded again, then 2-3 coats of enamel with sanding between each coat.


I stained the door with two coats of stain and two coats of polyurethane and installed the door knob.


Eventually I'll add the name of the chapel in the flat space above the door.

Interior priming, painting, and flooring installation

We chose travertine tile for the floor because it's a beautiful natural stone and incredibly cheap at a big box retailer as a stock item (somewhere around $2 per sq ft). Unfortunately each tile is also very heavy and easy to crack or break, and a pain to install. Definitely likely to be my least fun step of the whole chapel process :-)

All the tiles had to be sorted and mixed among boxes so that there was variation in color.


Finished product:


I didn't take pics of the painting and priming process on the interior walls but this pic shows some of this. Nothing is final at this point, just enough to be able to move forward with the interior woodworking. 


There's a good deal more progress, but I'll end this post here and start the next with the design I created for the interior.