(Brendan)
This is going to be long because I'm just going to get it over with in one post :-) Now that you've seen the design, here is an update on my construction progress in the chapel (as always, you can click on any pic to enlarge). The first item I needed to get out of the way was a trim piece for the circular window. I built a simple circle-cutting jig for my router and cut this out of 1/2" sanded plywood. Fortunately I only needed one try to get this right (which is a rarity for me when doing something new).
Here's the window trim installed, and the backing for the entablature (area on top of the columns).
Next began the laborious process of creating the woodwork that would go all the way around the chapel, which consists of 11 separate layers. There's other ways this could be constructed but this was my design in order to get the layers as close to stock thicknesses of wood (poplar for nine of the 11 layers) and minimize complicated cuts and routing on each layer.
I started the construction from the thin strip that forms the bottom layer, which I needed to ensure was level all the way around the chapel.
Layer 3 also involve routing as well as gluing and stapling a thinner strip to the larger board:
Next layers 7 and 8:
And then there was the bane of my existence, layer 10. I dreaded it for a long time :-) It's a cove like I used on the door trim and involves a lot of set-up and precision to get it right, much less repeatably right across many boards. Not to mention a lot of time and effort to create and a mountain of sawdust clean-up. Here's the process:
Glue-up boards:
Cut ends to square:
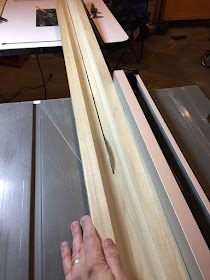
Set up the angular cut across the table-saw blade (set-up shown below next to the finished product). Need to get the angle right in order to get the right height and width of the cove. Each board involves about 30 passes over the blade, raising the blade 1/32" each time.
Now cut down the middle to create two halves:
Final trimming:
Some of the finished product after hand sanding:
Installation:
I left layer 11, the "dentils," for last because it involves dozens of small pieces which I could pre-cut and install over the winter after closing down my garage shop.
Buckets O' Dentils:
But I really wanted to finish the details on the entablature before Christmas, which I am happy to say that I was able to do. This involved creation of some detail pieces and installing some of the dentils.
Ta da!:
Remember this image from my 3D model?
It's definitely coming together! Progress!
Some of you may be wondering, "When does he do all this stuff?" To which I have two answers: 1) Late at night, 2) There's a reason it was almost 18 months between posts on this blog. It's a long, slow process.


Just.wow!
ReplyDeleteAwesome. I have written to you in the past about doing an article about your work on this house for Dappled Things (www.dappledthings.org). When you feel the project is at a stage to do something like that I'd really love to feature your story and show pictures of your work. I don't know if you've addressed this in a post I haven't seen, but did you do the chapel design yourself, or did you get an architect to make it for you. It's really well designed.
ReplyDeleteThanks for your comment, yes I did the chapel interior design myself. A lot of reading and modeling using old classical architecture textbooks I could find online. We certainly would be open to doing an article, it's probably still 9 months out in terms of getting close to completion so keep checking back!
ReplyDeleteThe choice of materials and design will greatly impact the atmosphere within the space.
ReplyDelete